Cross-Polarization: How to Photograph Artwork Without Glare the Correct Way
Share
Trying to photograph artwork without glare and reflections can be quite a daunting prospect, especially if you have never done it before. Whether you need to take a picture for an art exhibition submission or to print reproductions, it is important to get a clean, uniformly lit image in high enough resolution that results in a faithful representation of the original.
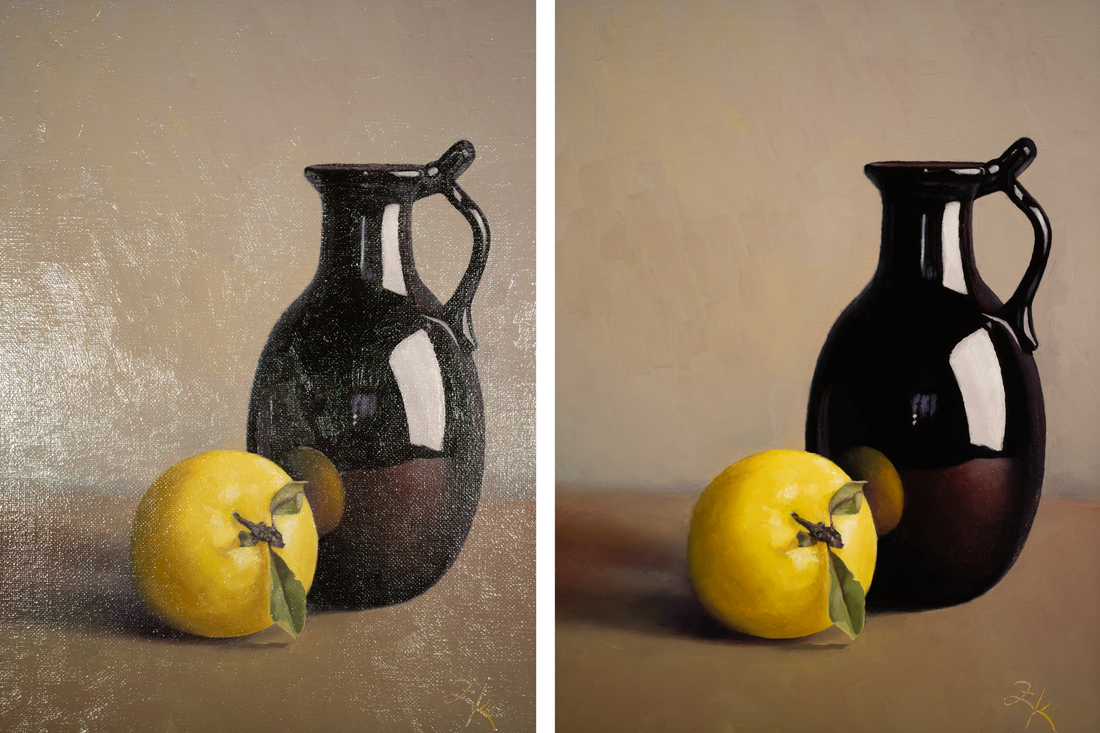
Unfortunately, oil paintings, glossy photographs, marble statues, metal objects, glassware, etc., all bounce light straight back towards the camera causing unwanted reflections and specular highlights. Such highlights are the easiest way to add realism to 3D rendering what also explains why so many games rely on glossy objects and wet look for that photorealistic effect. For our use case, however, these kinds of reflections are highly undesirable. Instead, we need to obtain a diffuse, scattered reflection image only as shown on the cover of this article. Think of the difference between white porcelain and chalk. One is shiny and reflective while the other one is coarse and uniform. The chalk it is then.
How Not to Do It
Over 15 or so years ago, IBM were tasked with recreating 3D models of Fabergé jewelry using laser scanning for their new high-end luxury online store. In order to reduce those unwanted reflections from shiny surfaces, IBM engineers dusted precious jewelry in a chalk-like powder to much displeasure of the Fabergé management. Apparently, it was very difficult to get that powder out of all the nooks and crannies afterwards. What a surprise!
Obviously, dusting artwork in white powder is a terrible idea and it would certainly not work when photographing flat 2D paintings either. Instead, the Internet is full of unscientific advice in form of random articles and videos. The general consensus seems to be to avoid harsh lighting usually by relying on softboxes or umbrellas, and to position the camera in a 45-degree angle from the light source. Some online experts go even further:
The true “secret” to reducing glare is to eliminate all (and I do mean ALL) sources of direct light falling on the painting. That includes the sun, the sky (yes, even on a cloudy day) photoflood lights, camera flash, and any auxiliary, artificial light sources.
There are countless online forum posts and articles on this topic all advising no flash photography, tilting the painting away from the camera, shooting under natural light in the shade, light cones, putting black cloth behind the camera, and a myriad of other home remedies. Also, most people suggest it is only possible to take usable pictures of an oil painting before it is varnished what is an utter non-sense!
Yet, the above picture of a fully varnished (and framed) painting was taken with two harsh lights in close proximity and without any black cloths, softboxes or other diffusion devices. So how is that possible?
Cross-Polarization to the Rescue
Cross-polarization photography is a standard scientific technique that relies on polarizing both the light source and the imaging device in order to remove glare and specular highlights. This helps to reveal surface details and textures within the photographed subject without distractions. For this technique to work, the light source needs to be polarized in a perpendicular orientation to the lens filter itself. But why?

The reason why cross-polarization removes all those pesky hotspots is because the directly reflected light causing specular highlights maintains the same polarization as the incident light, unlike the remaining scattered light. By placing a second perpendicularly oriented polarizer in front of the camera, all that reflected but still polarized light gets blocked by the second on-camera filter. This results in a nice clean image without any of those unwanted reflections. Magic!
Interestingly enough, this holds true regardless of the type of light being utilized including strobes, LEDs, and even natural light. There are countless peer-reviewed scientific articles published on this topic with applications in medicine, material science, photogrammetry and many more. There is no single inventor to attribute cross-polarization to but the whole premise ultimately relies on the work of Edwin H. Land, who patented the first polarizing material named Polaroid in 1929. There are many different types of polarizers if you want to learn more about this topic.
Common Use Cases
The most common use cases for cross-polarization photography are:
- Dental imaging: Likely one of the more prevalent applications of cross-polarization, dental imaging requires elimination of reflections in order to reveal the true color and translucency of the enamel for accurate assessment, shade matching, etc. Given the macro nature of this application, there exists a myriad of ready-made kits specifically for this field, see examples from PhotoMed, Dentalize, and many more.
- 3D scanning and texture mapping: Obviously, those IBM engineers did not get the memo but cross-polarization is also useful in photogrammetry and 3D scanning when dealing with shiny, translucent or otherwise difficult to scan objects. Another associated technique is that of texture mapping which adds visual detail without increasing the polycount in 3D rendering. Since lighting on 3D models is recreated at run time depending on how the scene is lit up, such textures need to be completely flat and devoid of any reflections. See the Megascans library by Quixel as an example.
- Material and mineral stress visualization: Another interesting application for cross-polarization is in conjunction with birefringence, a.k.a. double refraction. Material stress in transparent objects causes light to be split into two perpendicular components which can then be visualized as colored patterns through cross-polarization. Such psychedelic images can easily be recreated at home with a single polarizer and a computer screen acting as the source of polarized light as explained in a series of articles by Fstoppers.
- Digital archiving and reproduction: Conservation work these days relies on digitally archiving large quantities of mixed media. Just like with any other flash photography, removing unwanted reflections and glare is a key to successful reproduction. An interesting example of this application in practice is the elimination of silver mirroring effect when digitizing black and white prints because as it turns out, silver develops an inevitable sheen over time.
- Product photography: Finally, the very same technique can be used to remove unwanted glare in product photography as explained in an article by a commercial photographer George Mitchell.
Cross-Polarization Photography Flash Kit
Most readily available cross-polarization kits are specifically designed for macro photography. For anything more substantial, photographers tend to resort to all sorts of DIY solutions such as attaching polarizing sheets to LED lights or soft boxes using clamps, double sided tape and similar.
Instead, we have decided to assemble the best possible cross-polarization kit from off-the-shelf components that can easily be sourced online, fit well together and do not break the bank. Our criteria for such a kit were relatively straightforward.
It has to be:
- Light and portable: In the majority of cases, it is far easier to take the camera to the artwork than the other way round. Artworks tend to be expensive, unwieldly to handle and thus also difficult to transport. Therefore, our cross-polarization kit needs to be small, light and portable but still capable of producing museum-grade results.
- Wireless: The system needs to be also self-contained to avoid any unnecessary cables and charging bricks which just get in the way.
- Quick to assemble and easy to use: No one has the time to faff around with softboxes, polarizing sheets and double sided tapes. Our kit has to be assembled and configured in a matter of minutes.
- Factory-like fit: We are also not interested in DIY solutions for professional photography. Our kit has to behave like it came from the factory that way.
- Reasonably priced: Finally, it has to be relatively affordable given that most budding photographers and/or artists struggle to make ends meet.
The Kit Components and Their Alternatives
The first choice to make is whether to go with a flash unit or a continuous light instead. Given that we aim to photograph artworks and not record videos, flash units will deliver far more light with less power consumption for the same result. They will also naturally extend our run time since most reproduction sessions are spent by fiddling with the artworks and the camera setup, but not by taking the actual photographs. Furthermore, continuous lights, especially those with modern COB LEDs, produce significantly more heat that could damage the artworks making them unsuitable for our use case.

Flash Units with Round Magnetic Heads
Obviously, there are way too many different flash heads to choose from. Thus we can narrow the selection down to true wireless, battery operated units with an on-camera remote trigger only, in order to fulfil our portability requirement. Furthermore, to achieve a true factory-like fit with the polarizers, we have to look for those units that come with a standardized magnetic attachment system such as the one popularized by Profoto in their range of Clic accessories. Think of the iPhone MagSafe attachment system but for flashes. Any one of the Profoto A2, A10, or A1X units would be suitable for our use case together with their remote triggers Connect or Connect Pro.
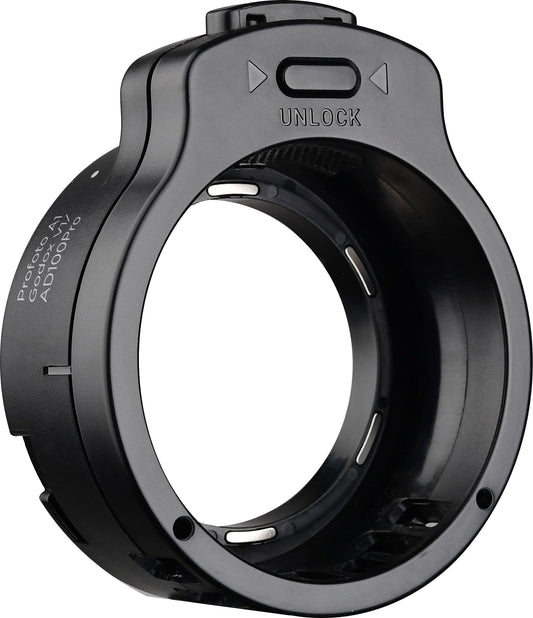
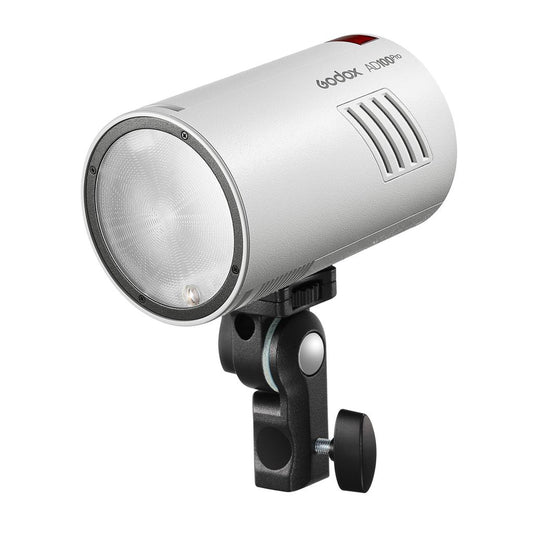
These are, however, fairly expensive even by professional standards. And since we would need two such flashes to achieve even illumination across a larger area, the cost of such a setup would be prohibitively expensive. Thus, following our own advice from our previous How to Buy the Same Photo Equipment but Cheaper blog post, we looked for more reasonably priced alternatives that will achieve the same results. Godox---also sold as Flashpoint by Adorama in the US---offer competing products but at a fraction of the cost. Any one of their round head V1, V1Pro, and AD100Pro flashes sport the same magnetic attachment system as Profoto as desired. Even rectangular flashes can be adapted to the same round magnetic system via the Godox S-R1 adapter. And if you need more power, Godox AD200 together with the H200R head supports the same magnetic accessories as the rest of them.

For our kit, we have chosen the Godox AD100Pro together with the latest X3 remote trigger due to its compact size and relatively affordable price. The original AD100Pro units were reported to have a green cast making them unsuitable for professional use. However, that has since been resolved since and we deliberately sourced only the white versions as those came out later with a reported CRI rating of 97+, see the Color Accuracy section below. White is also less likely to overheat in direct sunlight what is a plus.
Polarizers
To attach the polarizers to the round flash heads, we needed to source 72mm magnetic filters. Despite what the Internet experts say, it does not actually matter whether the filters are linear or circular polarizers (CPL). Brands such as Kase, Urth, and K&F Concept all provide a selection of magnetic polarizers in the required sizes. For our kit, we opted for two K&F Concept Nano-C Magnetic CPL Filters due to their excellent performance and reasonable price.
Similarly, the third standard screw-in polarizer for the camera lens can be pretty much any polarizer with a minimal color shift. To keep the system limited to only a few different brands, we opted for K&F Concept MC CPL Circular Polarizer Filter Ultra Slim since it is from the same C-series of K&F filters as the magnetic ones. Note, however, that its diameter has to match your lens filter size, unlike the other two filters that mount to the flash heads.
Light Stands
Light stands are a category on their own and there are simply too many to choose from. Popular options include aluminum, carbon fiber and even stainless steel for heavy duty studio work. Since our kit needs to be portable, light and reasonably priced, we opted for two Fosoto FT-190B which are 2.2m tall but weigh only 800g each.
Cross-Polarization Alignment
Once fully assembled, the final step is to align the orientations of the respective filters in order to achieve the desired cross-polarization results. This can be done in three easy steps the aim of which is to ensure that the two flash units are polarized in the same direction. Start by placing the flash heads next to each other with their light stand brackets attached and facing the same direction.

- Attach the two magnetic filters to the flashes and place the third screw-in filter in the middle on top of them with its threads facing upwards.
- Rotate the third screw-in filter until it goes completely dark over one of the magnetic filters.
- Rotate the other magnetic filter (but not the flash unit itself) until the overlapping section goes also completely dark and you are good to go.
Once the filters on the flashes are aligned, all that remains to do is to set the camera on a tripod perpendicularly to the photographed object and rotate the screw-in filter on the lens until the specular highlights fully disappear. To aid in picture framing and to achieve the most straight towards camera artwork alignment, we recommend switching the in-camera gridlines on. Happy shooting!
Color Accuracy
As explained in incredible detail in the dissertation by TA Haila (shorter article version), cross-polarization can indeed affect the colors of the reproduced artwork:
The findings have proved to contradict and refute the common misconception that polarization filters do not alter colors or affect them in any negative way, and such filters only make colors look more saturated and stretch their dynamic range while lowering the light intensity no more.

Therefore, for any kind of cultural heritage or high-end reproduction work, we would always recommend using light sources with a very high color rendering index (CRI) rating in conjunction with color calibration charts such as those by Calibrite. According to the aforementioned research, these will not fully eliminate the discrepancies in perceived colors, however, they will significantly reduce the error in the color difference ∆E00 to an acceptable level.
All you need to do is to take a photograph of the color checker chart under the same cross-polarization lighting as your artwork, create a custom camera profile from it and then apply that profile to all of the images during post processing. This will correct for any potential color shifts that might have appeared due to cross-polarization. Please note that the color checker chart is not included as part of the Photogyric kit and needs to be purchased separately.
FAQ
-
Does this technique also work with iPhones?
The short answer is Yes! There are even ready-made kits specifically from the dental industry such as those listed on PhotoMed and AliExpress. Some external flash units can also be triggered via bluetooth or WiFi from mobile phones such as Godox A1 (discontinued), LIT Flash, CPFlash 550W, and Profoto A10 and B10.


